Building a simple API in Rust using PostgreSQL
Overview
I’m starting my studies with the Rust dialect. Throughout the article I will show the codes and commands used to build an API with the Rust language. For this project, no web framework was used and also no ORM, the language’s own native network TCP server is used.
The idea is to create a CRUD of users, where it is possible to execute the following functionalities:
- Create a users;
- List a user with their ID;
- List all registered users;
- Update a users;
- Delete a user.
1. Project Architecture
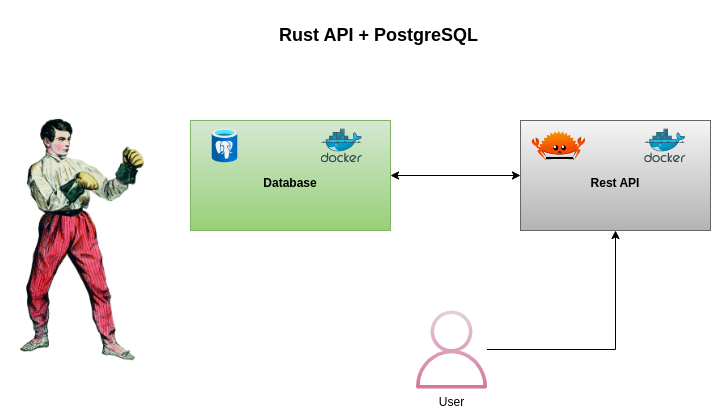
Two containers were created, one for the database and another for the Rest-API.

2. The code
The code is available in: https://github.com/edersoncorbari/rust-rest-api
3. Hands-on
Cloning the project:
$ git clone git@github.com:edersoncorbari/rust-rest-api.gitTo compile the project you need to have Rust installed on your workstation. To install click on the link below:
If you want to compile the project manually, you need to have a PostgreSQL database running. And execute the export of the environment variable with the parameters of the connection:
$ export DATABASE_URL=postgres://postgres:postgres@localhost:5432/postgresDebug mode compilation:
$ cargo buildRelease mode compilation:
$ cargo build --releaseRust creates the build in the target folder at the root of the project. To run the project just run:
$ cargo runBut remember if you need to have a running PostgreSQL database!
If you don’t want to compile the project manually, just run Docker to create the containers and simply test the endpoints!
4. Tests
The available endpoints are:
| Method | EndPoint | Parameter | Payload |
|---|---|---|---|
| POST | /users | not required | {“name”:”User1”, “email”:”u1@xxx1.com”} |
| GET | /users/ | ID | not required |
| PUT | /users/ | ID | {“name”:”User0”, “email”:”u0@xxx0.com”} |
| GET | /users | not required | not required |
| DELETE | /users/ | ID | not required |
You can test using the curl command, or using Postman or something similar. Using Postman, just import the collection in the project’s doc folder.
4.1 Creating a user
$ curl -i -H "Content-Type: application/json" -X POST http://127.0.0.1:8080/users -d '{"name":"User1", "email":"u1@xxx1.com"}'4.2 Checking created user with ID
$ curl -i -H "Content-Type: application/json" -X GET http://127.0.0.1:8080/users/14.3 Updating user data
$ curl -i -H "Content-Type: application/json" -X PUT http://127.0.0.1:8080/users/1 -d '{"name":"User0", "email":"u0@xxx0.com"}' 4.4 Checking all registered users
$ curl -i -H "Content-Type: application/json" -X GET http://127.0.0.1:8080/users4.5 Deleting a user with ID
$ curl -i -H "Content-Type: application/json" -X DELETE http://127.0.0.1:8080/users/1For more detailed information, please consult the project’s README.
